*********UPDATE**********
As mentioned in part two of this series, VMware now offers a public Harbor repository and Docker registry for the purposes of deploying NAPP. The information for each of these is below:
Helm Repository: https://projects.registry.vmware.com/chartrepo/nsx_application_platform
Docker Registry: projects.registry.vmware.com/nsx_application_platform/clustering
If you are utilizing the VMware public offerings above, you may skip down to ‘Deploying NAPP‘ and follow along for the remainder of the post.
**********************************************
In the first six parts of our series on ‘Deploying NSX Application Platform‘, we’ve :
- Discussed requirements for utilizing NSX Application Platform (NAPP)
- Deployed a Harbor instance to act as our registry for NAPP
- Deployed a Kubernetes (K8s) infrastructure to our vSphere environment by way of Tanzu Community Edition
- Installed and configured MetalLB to our TCE Workload Cluster
If you have not already done so, please download the NSX Application Platform bundle from the VMware Customer Connect portal; you can find it under the ‘VMware NSX Intelligence‘ section. As of this writing, the file name is ‘VMware-NSX-Application-Platform-3.2.0.0.0.19067744.tgz‘ and it’s a little over 23 GB in size.
Deploying NAPP components to Harbor
Please review the directions for uploading the NAPP components . As we did previously, rather than just repeating the existing directions, we’ll provide context to what we feel are the most important elements.
As identified in the prerequisites section, the host that you utilize to upload the NAPP components to Harbor must have both curl and Docker installed locally. While not mentioned in the current documentation, you’ll also need helm.
While we discussed it in-depth in part one and part two, in the prerequisites you’ll find a reminder that your Harbor instance must utilize a CA signed certificate. If you’ve been following this series in order, you’ve already done this, but we mention it here as now we are reaching the point where, if you used a self-signed certificate for Harbor, you will begin having problems.
The directions themselves (located under Procedure) are fairly straightforward. To begin, you’ll unpack the tar file using:
tar xvf VMware-NSX-Application-Platform-<version-number>.tgzOf course, you replace the <version number> with the actual version from the file; in our case, this is would be:
tar xvf VMware-NSX-Application-Platform-3.2.0.0.0.19067744.tgzInside the root directory where all of your NAPP files now exist, you’ll need to edit a file named ‘upload_artifacts_to_private_harbor.sh‘. This is a script provided by VMware to make moving the NAPP files to your Harbor registry as painless as possible . The first three lines of the script must be populated with the proper data, which are:
- DOCKER_REPO= This is the URL of your Harbor repository appended with the project name
- DOCKER_USERNAME= The username to access your harbor repository
- DOCKER_PASSWORD= The password for the Harbor user above
A completed example of the entries:
DOCKER_REPO=harbor.myhomevlab.com/napp
DOCKER_USERNAME=admin
DOCKER_PASSWORD=MyHarborPassword
That’s all you’ll need to edit in the file. Next, we will need to make the file executable, so we can run the script. You may do this by using the following command:
chmod +x upload_artifacts_to_private_harbor.shOnce that is completed, our final step is to execute the script:
./upload_artifacts_to_private_harbor.shThis begins uploading the helm charts and docker containers that were unpacked from the ‘VMware-NSX-Application-Platform-<version-number>.tgz‘ file. This process can take some time, so be patient as everything is uploaded. Below is a screenshot of how the process looks at initiation:
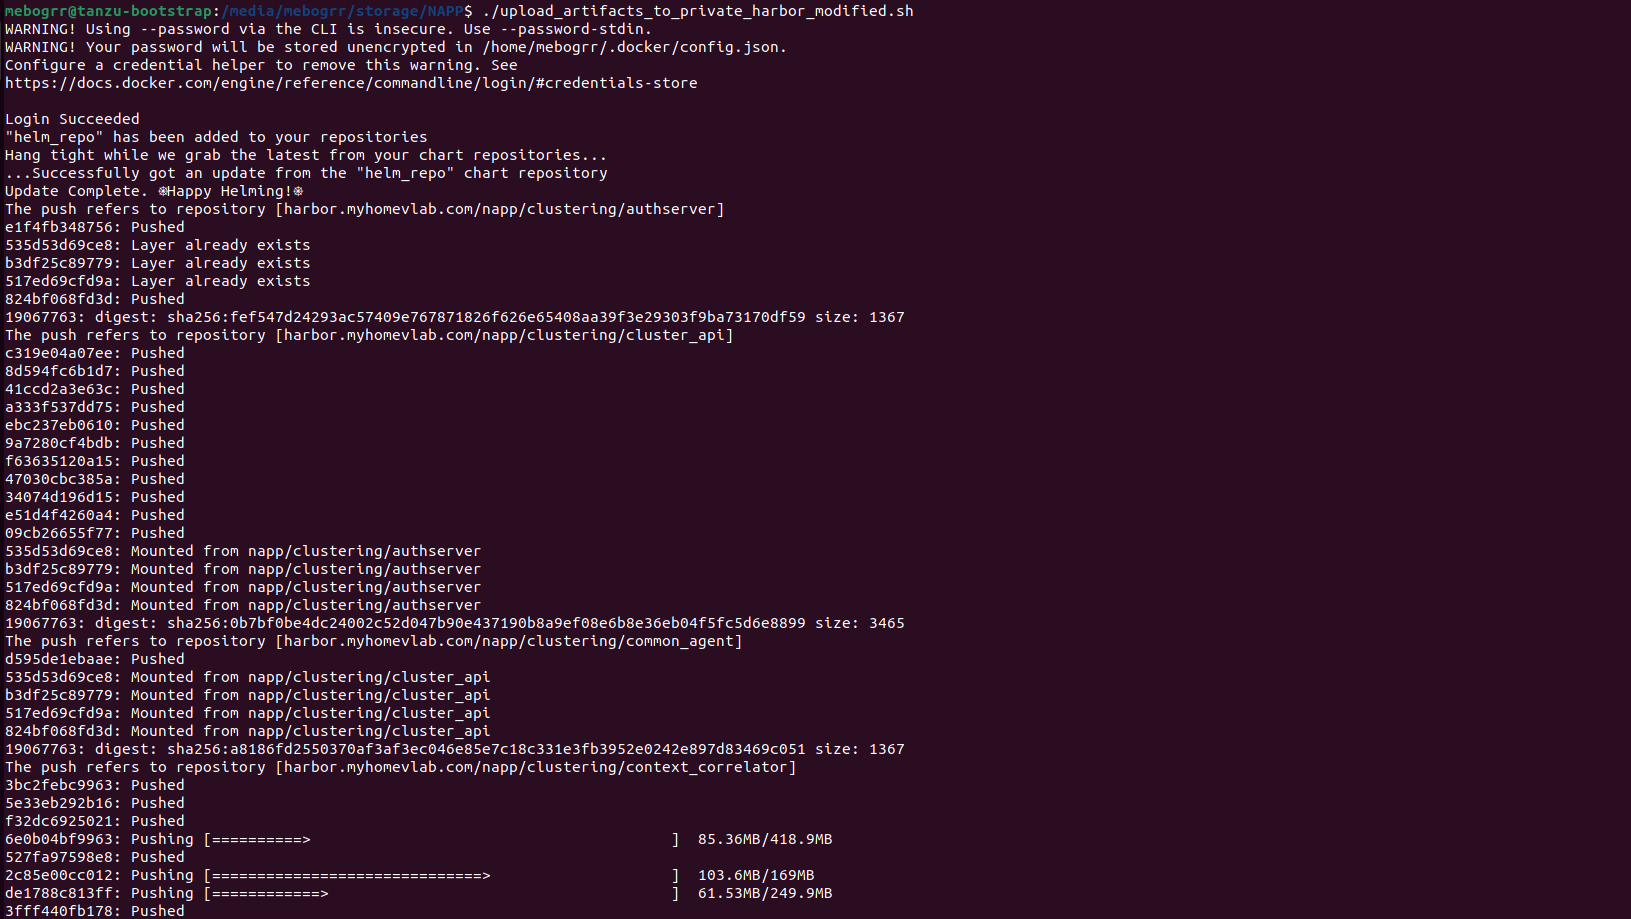
As the script starts, it logs into Harbor, creates a helm repo, and then begins pushing all of the docker containers up to the Harbor repository. After all the docker containers are uploaded, the script concludes by using curl to upload all of the NAPP helm charts; you’ll see the result of the curl actions by a list of ‘{“saved”:true}‘ entries before the script completes and you’re returned to your prompt. Here’s an example of how this appears:

Deploying NAPP
Now that we have our NAPP components uploaded to our Harbor repository (or, perhaps you’re using the public VMware Harbor repository, as mentioned at the opening of this article), we’re finally ready to deploy NAPP to our environment.
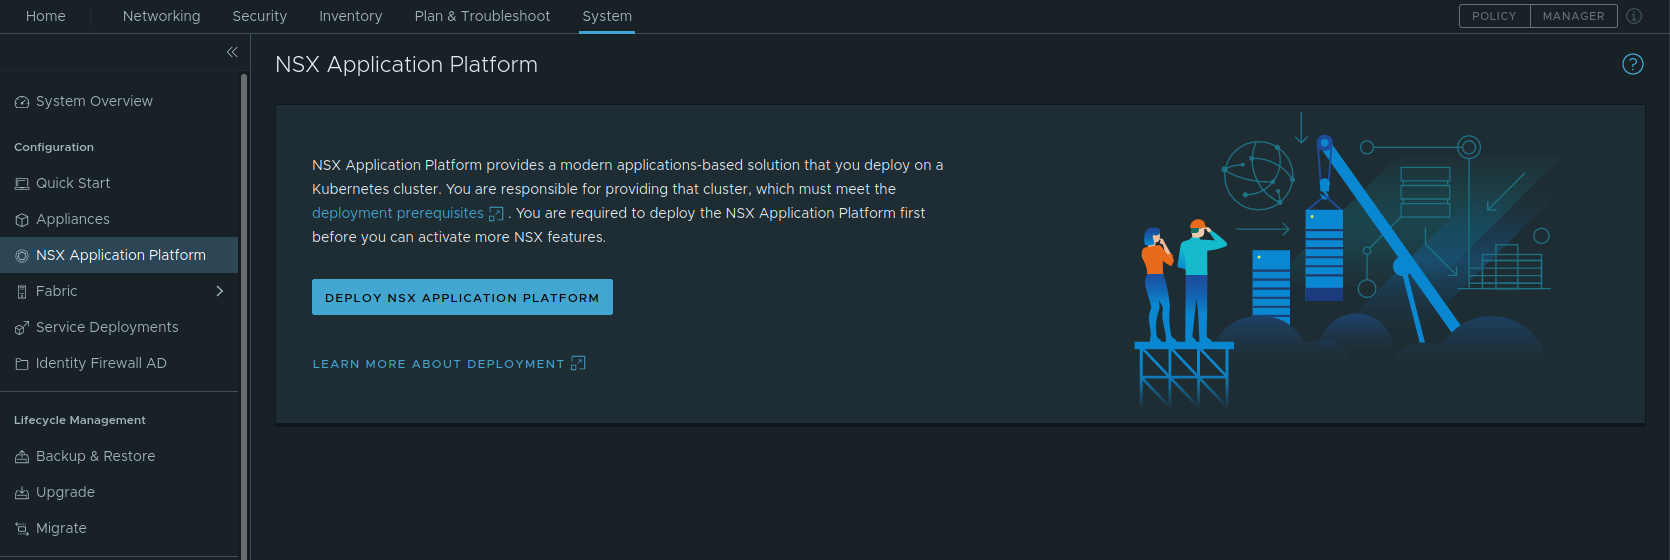
To start, we login to our NSX-T Manager instance, and go to System -> NSX Application Platform. Here you will find the NSX Application Platform launch page, where a brief explanation regarding NAPP is provided. Click the ‘Deploy NSX Application Platform’ button to get started deploying NAPP.
Step 1 – Prepare to Deploy
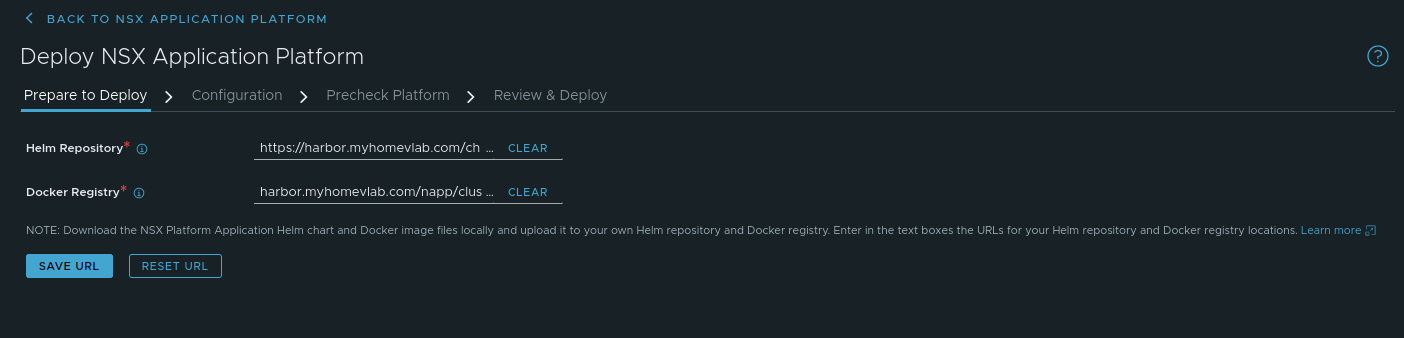
The first step in deploying NAPP is ‘Prepare to Deploy‘, and you will enter the URL for your Helm repository as well as your Docker registry. There are a few key details you’ll want to ensure you get right for your deployment:
- Helm Repository – This is the URL of your Harbor repository and will be in the format https://<harbor fqdn>/chartrepo/<harbor project name>. In our lab, this entry is https://harbor.myhomevlab.com/chartrepo/napp, which is comprised of the FQDN for our Harbor registry (harbor.myhomevlab.com) and the Harbor project we created earlier in the series (napp).
- Docker Registry – This is the URL that the docker instances in your workload domain will utilize to pull down the NAPP components, and is in the format <harbor fqdn>/<harbor project name>/clustering. In our lab this entry is harbor.myhomevlab.com/napp/clustering.
An important note:
- the Helm Repository entry begins with ‘https://‘
- the Docker registry does not begin with ‘https://‘; it contains only the FQDN of your Docker registry.
If you begin the Docker registry entry with ‘https://‘, the docker instances in your workload cluster will be unable to successfully resolve the address, and your NAPP deployment will fail. Take a look at the above screenshot to verify how this should appear.
Once you’ve populated both entries, click the ‘Save URL‘ button. At this point, the screen will change slightly and you’ll be presented with two new fields that are prepopulated with data. These fields are ‘Platform Target Version‘ and ‘Chart Name‘. As we are installing NAPP for the first time, the data presented here is just for observation; in fact, the ‘Chart Name‘ field is non-editable, and exists to demonstrate the NAPP helm chart that was located on your Harbor instance.
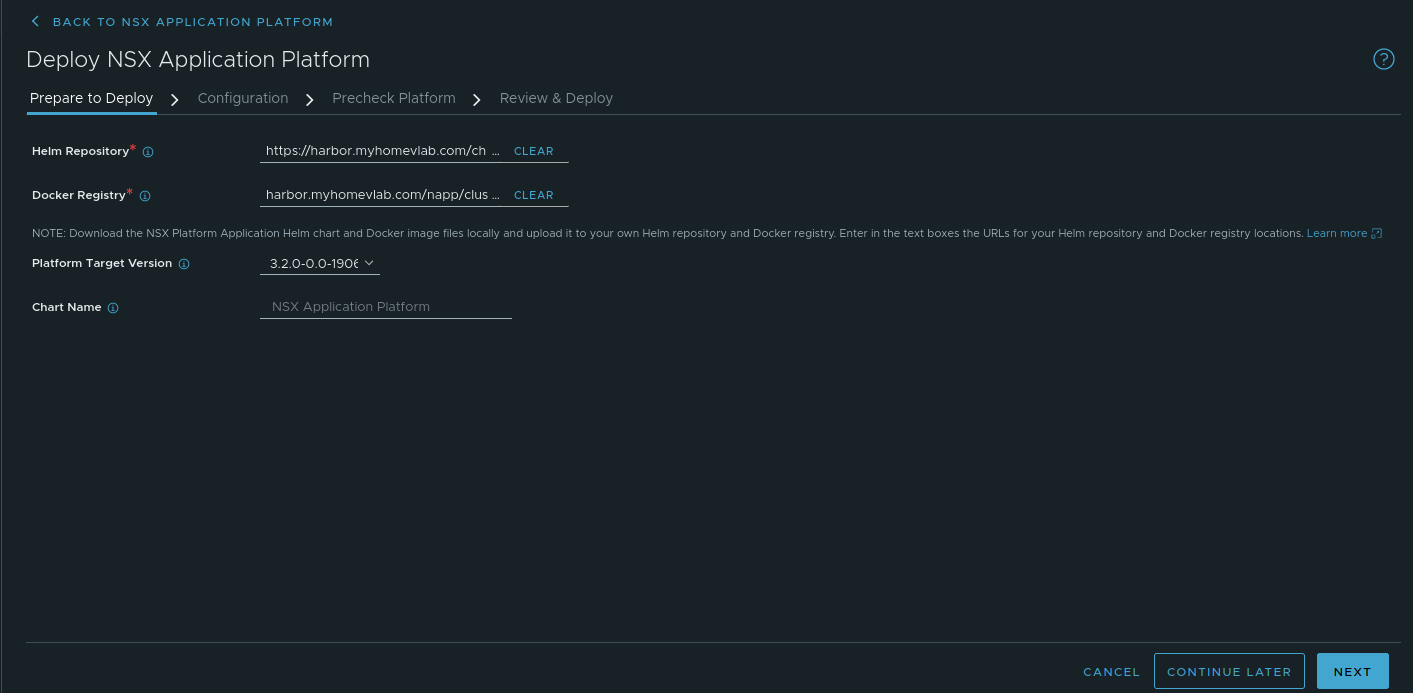
Click the ‘Next‘ button at the bottom right to move onto step 2.
Step 2 – Configuration
On the configuration page, the first action you must take is to upload the kubeconfig file we created in Part Five of this series. Click the ‘Select‘ button and choose the kubeconfig file. Now click the ‘Upload‘ button to upload the kubeconfig file to the NSX-T Manager.
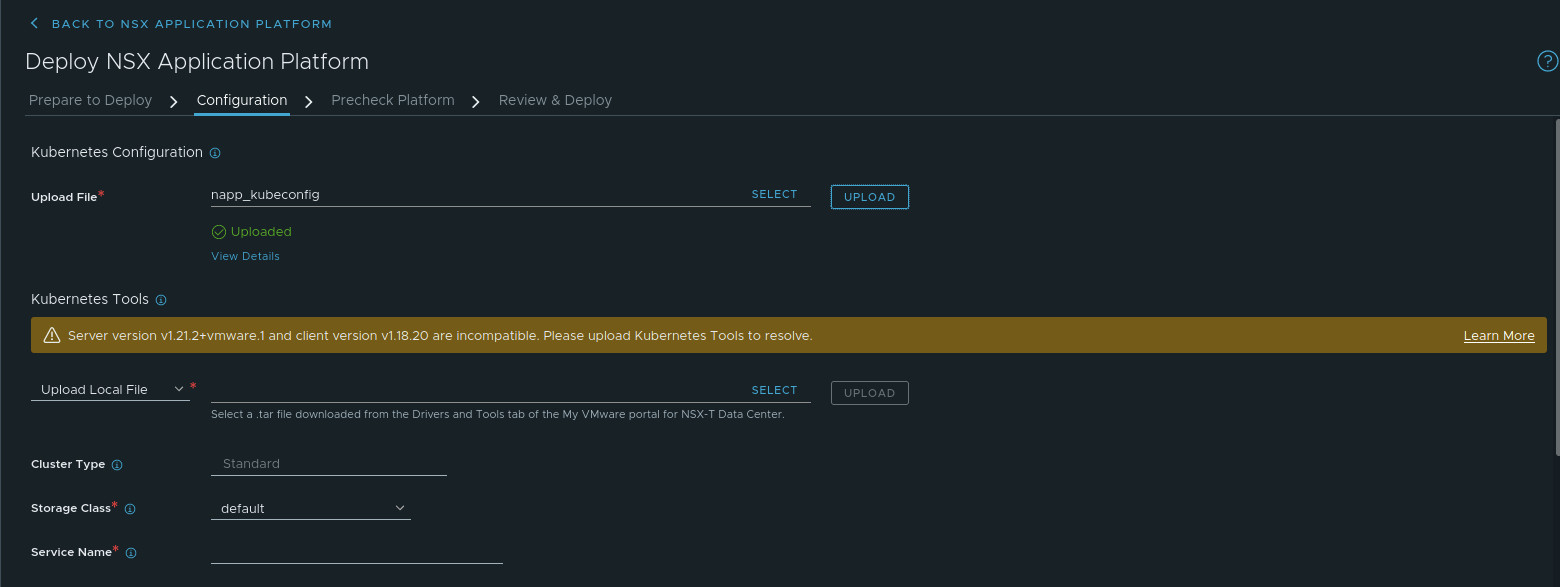
In the above, we’ve successfully uploaded our kubeconfig file; the NSX-T manager has parsed the data within and has successfully communicated with the control plane of our TCE Workload cluster. However, we now have a problem, shown in yellow. The message within states “Server version v1.21.2+vmware.1 and client version v1.18.20 are incompatible. Please upload Kubernetes Tools to resolve.”
Back in Part Three of this series, we identified that to deploy TCE, you must create a template of an approved Ubuntu or Photon OVA. In our environment, we utilized the Photon v3 Kubernetes v1.21.2 OVA from the VMware Customer Connect for this purpose.
However, the NSX-T 3.2 Manager comes installed with version 1.18.20 K8s tools. Since the K8s version of our Photon image is more than one version greater than 1.18 (ours is using 1.21), we’ll need to update these tools to a newer version to move forward.
Luckily, this is as simple as downloading the proper toolset from the Customer Connect site. Under the VMware NSX Intelligence 3.2.0 heading, find the ‘Kubernetes tools 1.20‘ entry (the file is named ‘kubernetes-tools-1.20.11-00_3.5.4-1.tar.gz‘). As mentioned in the notes for the file, this toolset will work with Kubernetes v1.19, v1.20 & v1.21. Since we are using a Photon OVA with K8s v1.21.2, this toolset will work for our needs.
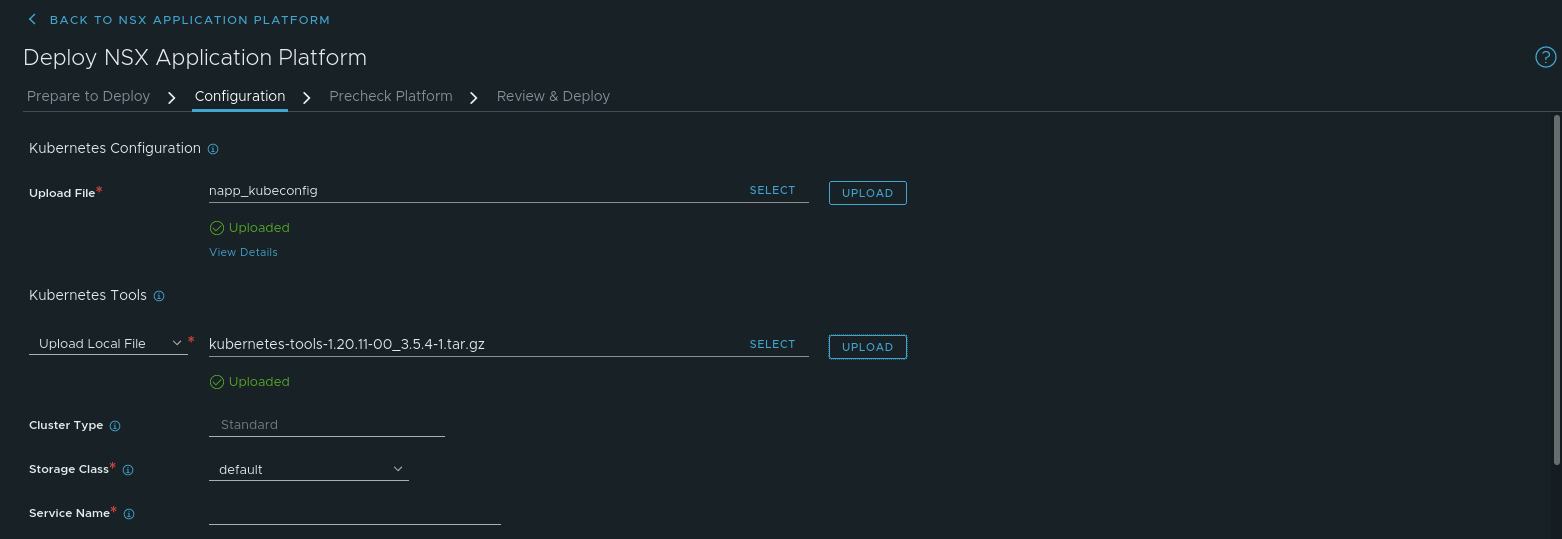
Back in the Configuration screen of NAPP, under ‘Kubernetes Tools’, the drop down should state ‘Upload Local File‘; leave it at this setting. Now you’ll hit the ‘Select‘ Button, and choose the ‘kubernetes-tools-1.20.11-00_3.5.4-1.tar.gz‘ file, then select ‘Upload‘. The bundle will be uploaded to the NSX-T manager and verified.
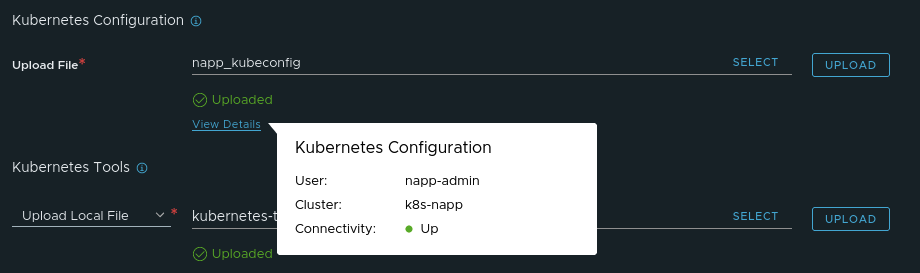
You can see in the above screen where we’ve successfully uploaded our K8s toolkit. As an aside, you can move your mouse over the ‘View Details’ above the ‘Kubernetes Tools‘ section, and you will see that the NSX-T manager displays your K8s cluster name, the user for that cluster, and the connectivity between the NSX-T manager and the control plane components of the K8s cluster. You can see an example of this in the screenshot below.
Moving on, you may ignore the ‘Cluster Type‘ and ‘Storage Class‘ entries; ‘Cluster Type‘ is a read-only field, so there’s no change we can make there. As we did not configure any type of unique K8s storage options while deploying Tanzu Community Edition (TCE), you can leave the default entry of ‘default‘; in fact, if you do click the drop down for ‘Storage Class’, your only option should be be ‘default‘.
However, we must populate the ‘Service Name’ field. This is the FQDN we requested you create in part six of this series. In our lab, we created ‘napp.myhomevlab.com‘ and associated the first address from the MetalLB VIP pool with this FQDN in our DNS.
Lastly, at the bottom of the page, we have to choose the ‘Form Factor‘ for NAPP, which just means that we are making sure that our NAPP deployment corresponds to the sizing of our TCE Workload Nodes. As we stated back in part two, our deployment will be using the ‘Standard‘ Form Factor, as our existing lab does not meet the requirements for the ‘NSX Intelligence‘ feature of NAPP.
If we scroll down, we can also see there’s a third Form Factor, ‘Evaluation‘, and it’s listed under the ‘Non-production Use Only‘ heading (‘Standard‘ and ‘Advanced‘ are both under ‘Production Use‘). Just for clarity, we’ll show all three form factors here:
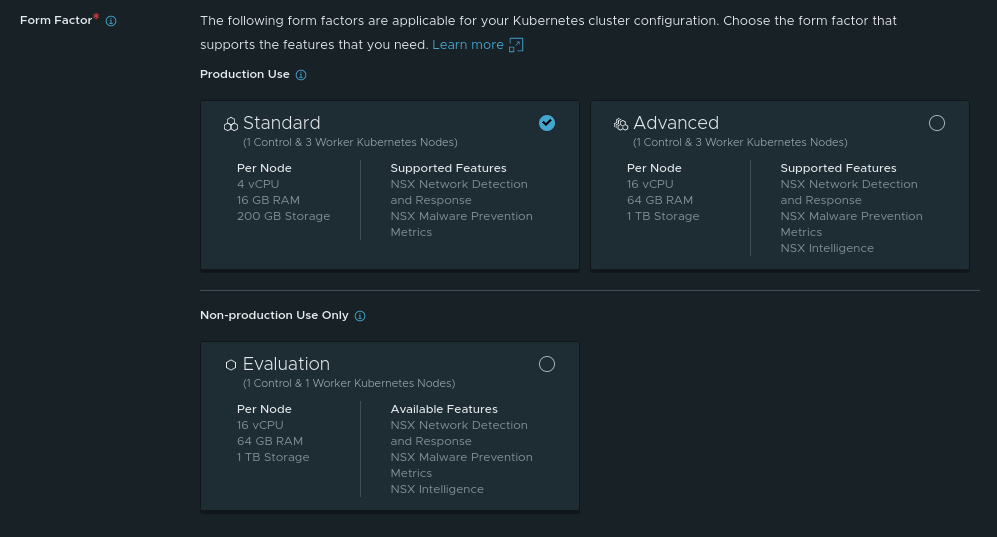
As you can see, we’ve selected ‘Standard‘; however, this screen does give a nice breakdown of what is required for each Form Factor from the perspective of vCPU, memory, storage, and node count. It is also quite descriptive in identifying features associated with each Form Factor.
Click ‘Next‘ at the bottom right of the screen to proceed.
Step 3 – Precheck Platform
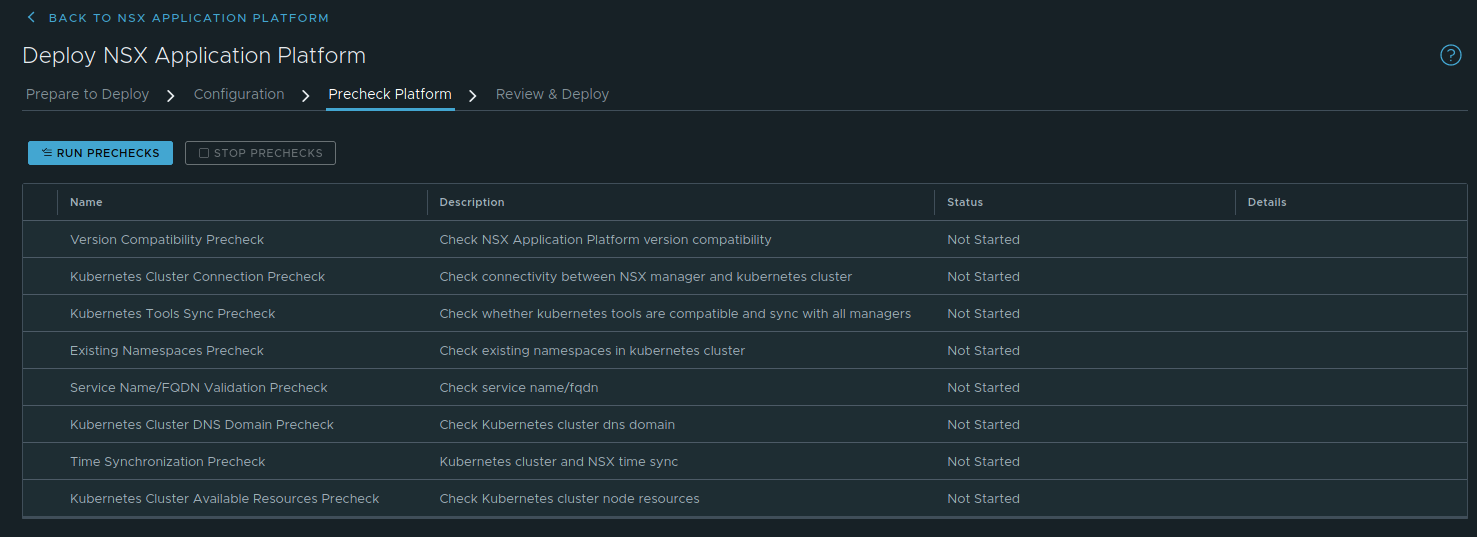
Step 3 is simply a series of prechecks that NSX-T will run to ensure that everything is in order for your NAPP deployment. Just click the ‘Run Prechecks‘ button to start the tests. Below you can see the results of our completed test:
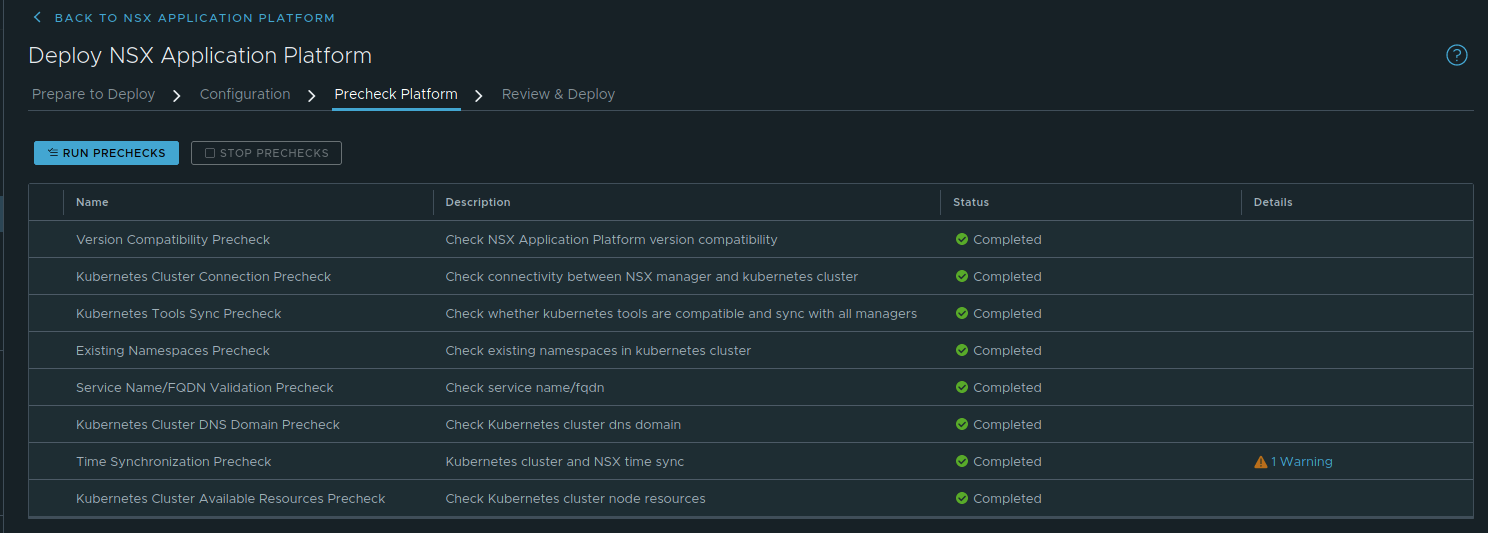
You can see, we have a warning listed under ‘Time Synchronization Precheck‘. The message states “Kubernetes cluster and NSX time should be in sync“. Full transparency: We triple checked that both our NSX-T manager and the ESXi hosts upon which the K8s nodes reside are configured to utilize NTP correctly and were doing so. This may be more of a “make sure this is configured” warning rather than an actual finding.
Nonetheless, now that prechecks have completed, click ‘Next‘ at the bottom right to proceed to our final step.
Step 4 – Review and Deploy
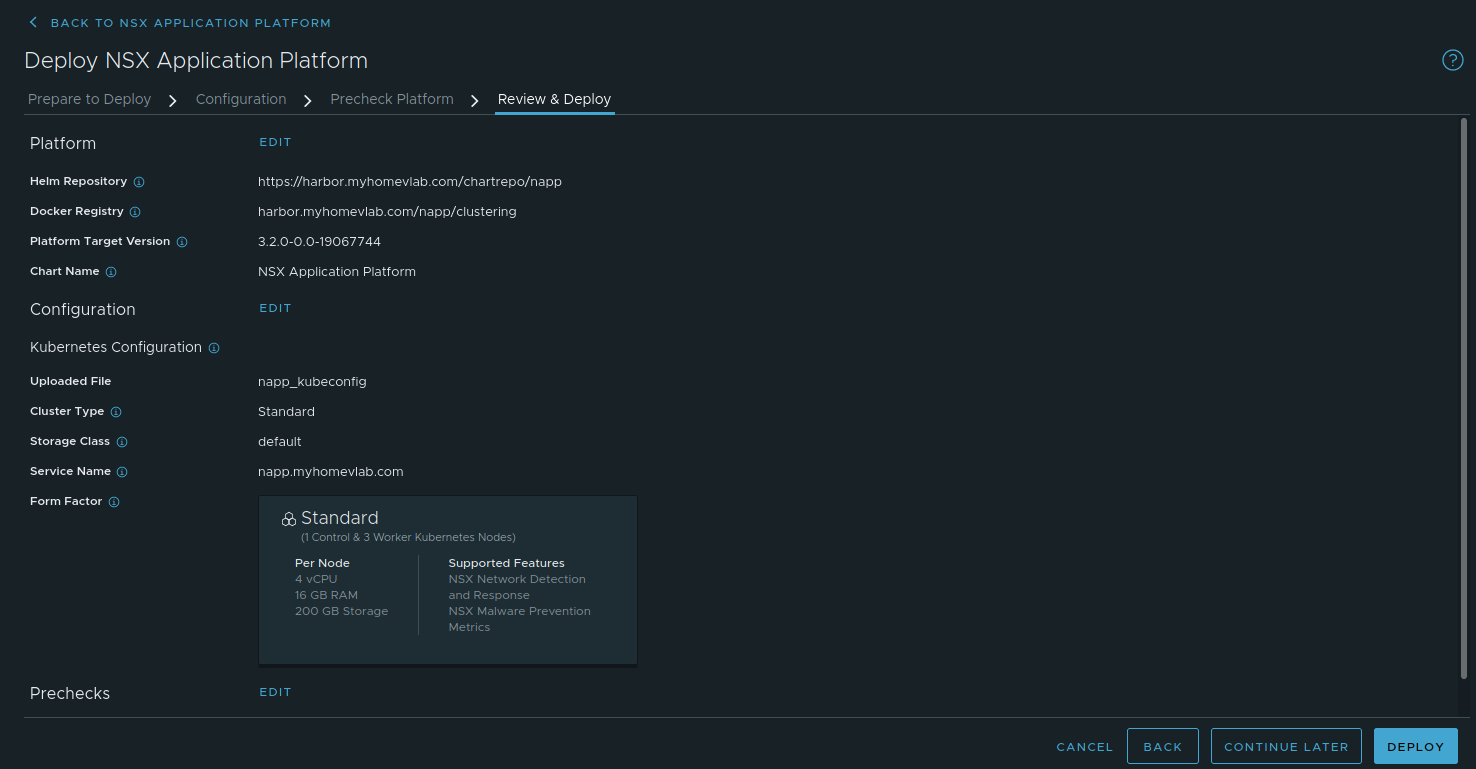
As you might expect, this is a final screen before deployment where you can verify your configuration is as you intend before moving onto the actual deployment. Once you’ve looked everything over, click ‘Deploy‘ at the bottom right to kick off the actual deployment of NAPP.
NAPP Deployment in process
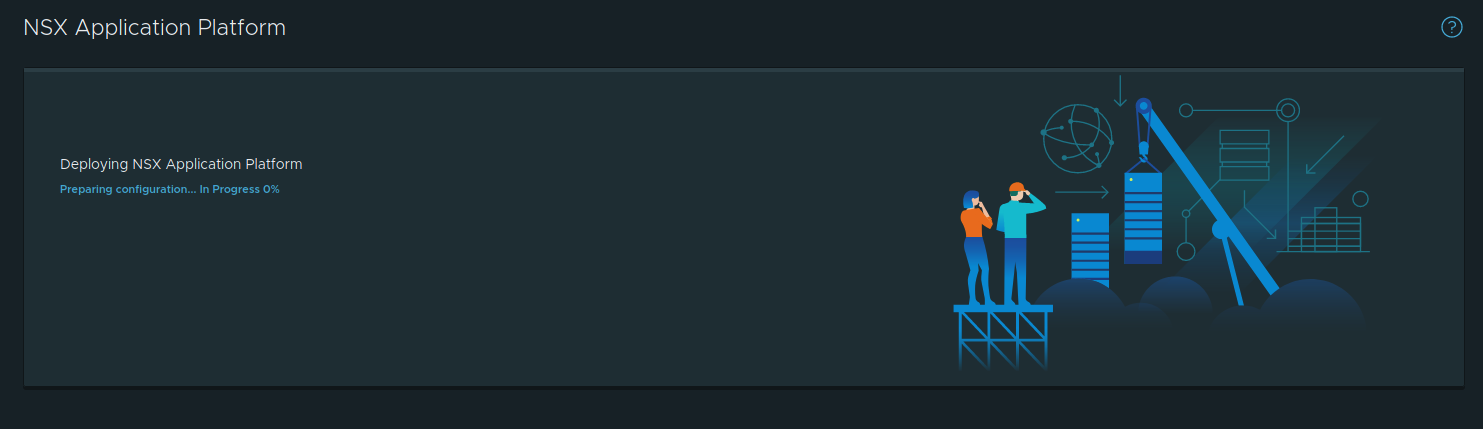
Above is the screen where you observe NAPP being deployed; this was captured right at the initiation of the deployment, so you can see it actually states “Preparing configuration… In Progress 0%“. This will swiftly change to “Installing Certificate Manager… In Progress 10%“. As more components are installed, you’ll see what is being presently installed as well as the overall percentage of the completed install.
Admittedly, this isn’t a blindingly fast process, so sit back for a while and allow NSX-T to deploy the NAPP components to your TCE Workload Cluster. However… after a little while….
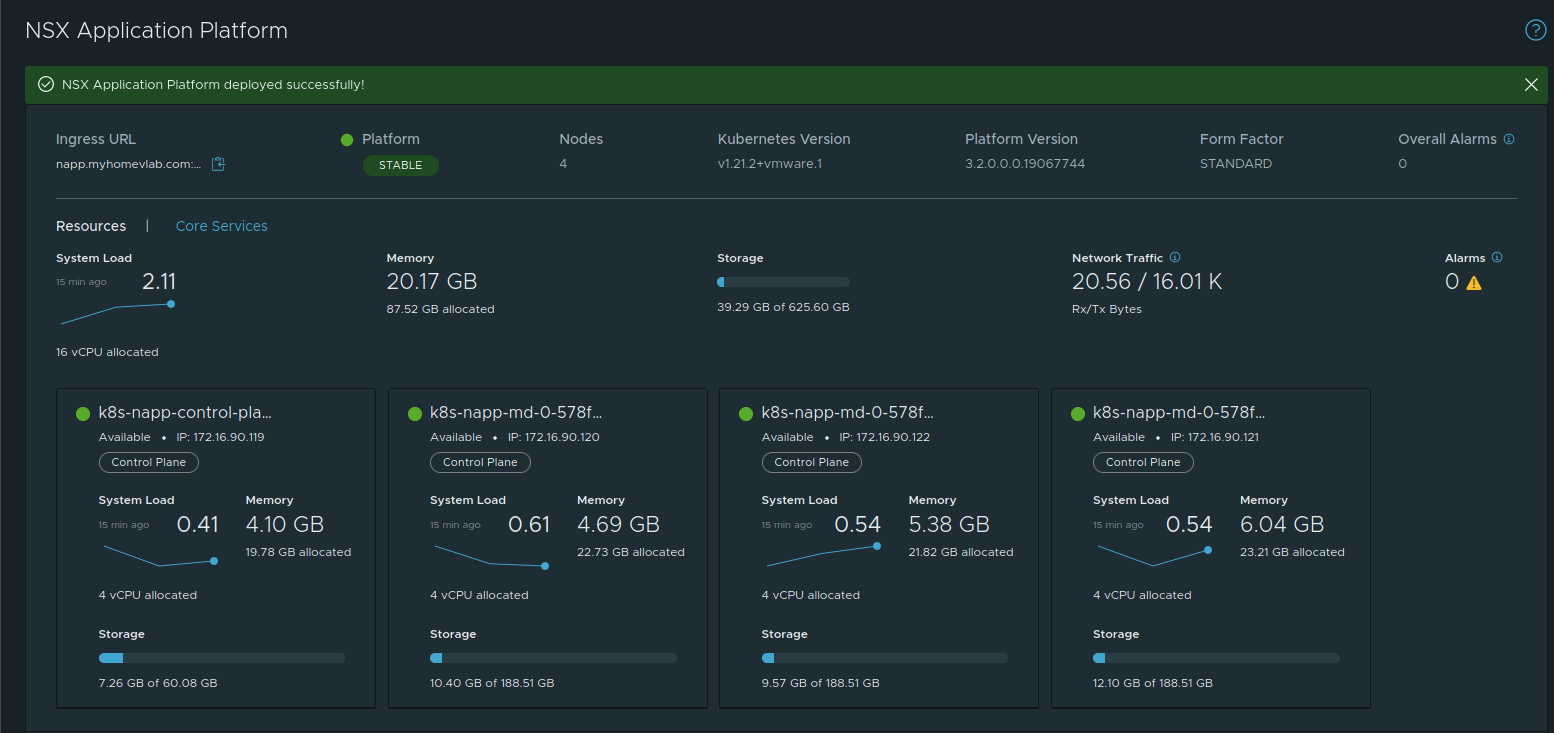
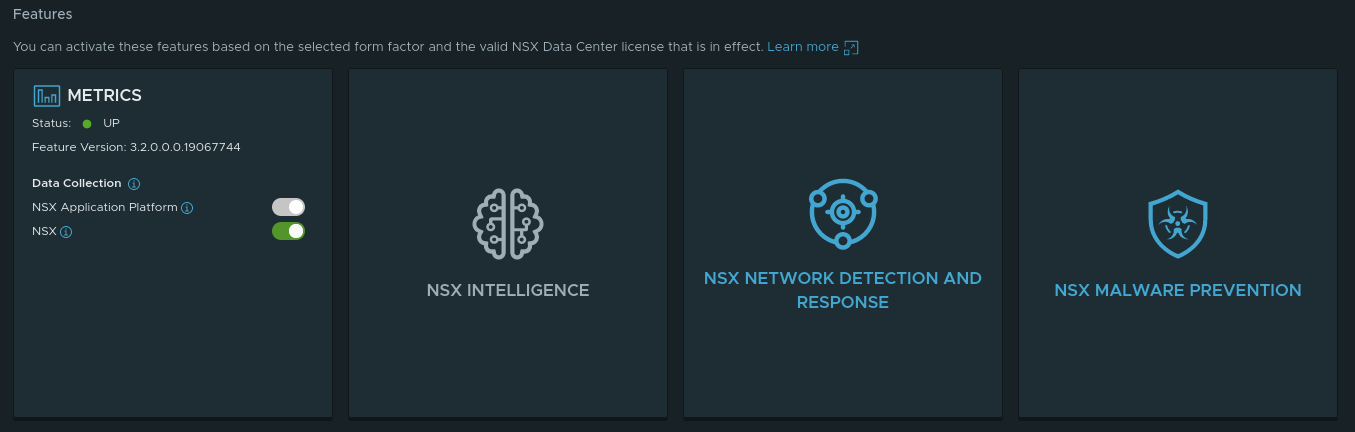
Success! We now have a fully functioning deployment of NAPP in our NSX-T 3.2 environment!! If you scroll down on this page, you can see the available features of NAPP:
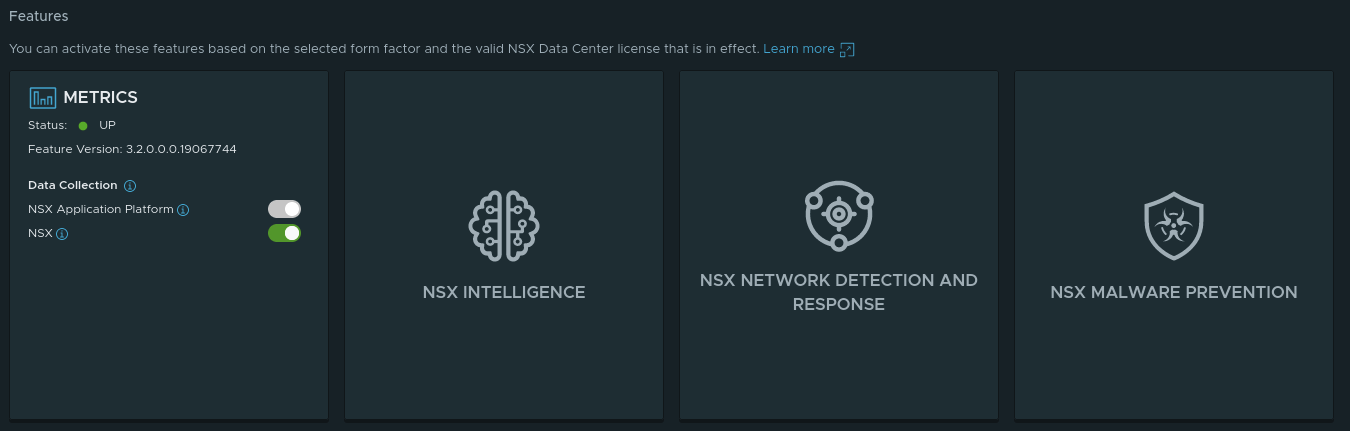
The Metrics feature is enabled by default; no extra action is required. The remaining features are dependent upon 1)- Proper Form Factor (this is applicable to the ‘NSX Intelligence‘ Feature) and 2)- Licensing, which both ‘NSX Network Detection and Response‘ and ‘NSX Malware Prevention‘ require additional licensing to enable.
If you notice, the features aside from Metrics in the above screenshot are all in white/light gray. This color means you are lacking in one of the two areas listed above (Form Factor or licensing). By moving your mouse pointer over each of these features, you’ll receive a popup message, such as the ones below:
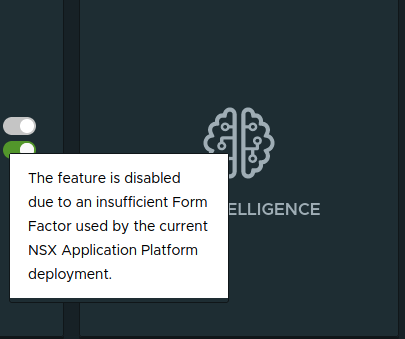
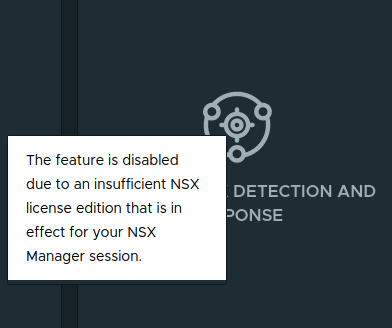
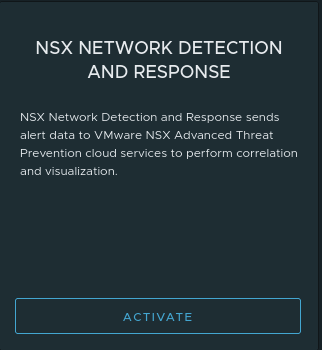
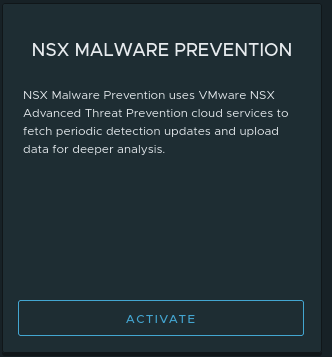
So the Form Factor we’ve used in our lab (due to hardware limitations) can’t support NSX Intelligence, as you can see on the left. However, once we apply an Advanced Threat Prevention Add-on license, you can see how the list of features changes:
Now we can see ‘NSX Network Detection and Response‘ and ‘NSX Malware Prevention‘ are in blue, which indicates that these features may be activated. By moving your mouse pointer over one these features now, you’ll see the below:
Wrap Up
This brings an end to our series on deploying NAPP via Tanzu Community Edition and MetalLB, as well as walking you through deploying your own Harbor repository. Hopefully you’ve found value in following along with us as we broke down this topic in-depth.
This is it for now! See you next time!!
