At this point in our series, we have successfully deployed the following:
- A Harbor instance
- A Tanzu Community Edition (TCE) Management Cluster
- A TCE Workload Cluster
Before we can deploy NAPP, we first must meet one final requirement. Let’s take a look at the following section for more details.
NAPP requirements for services / load balancing
If we review the full list of NAPP prerequisites, near the bottom of the list you’ll find an entry for ‘Service Name (FQDN)‘. Below you can find a capture of the data for this specific section:

The ‘Service Name‘ (along with other K8s services created for NAPP) requires the use of K8s service type ‘LoadBalancer‘, which utilizes an external load balancer to provide external users access to a containerized application. This requirement is mentioned explicitly in the NSX Application Platform System Requirements. An excerpt of applicable part of this page is below:
When deploying the NSX Application Platform, you must configure your TKC or upstream Kubernetes cluster to have a load balancer (LB) IP pool with at least five IP addresses. To finish an NSX Application Platform deployment successfully, the platform requires at least five available IP addresses. If you plan to scale out your NSX Application Platform deployment later, your TKC or Kubernetes cluster LB IP pool must contain one more IP address per Kubernetes node used by the platform. Consider configuring your TKC or upstream Kubernetes cluster LB IP pool with a total of 15 IP addresses, since VMware only supports a maximum of 10 additional Kubernetes nodes after scaling out the platform.Throughout this series, we presume you do not have the NSX Advanced Load Balancer available in your environment. As such, we elected to utilize MetalLB as our K8s external load balancer. If you look in the above prerequisite list, you’ll see MetalLB is a supported solution.
Deploying MetalLB
Deploying MetalLB is quite straightforward, especially for our purposes, as we’ll be deploying it in it’s Layer 2 mode. This means that the virtual IP addresses (VIPs) provided by MetalLB sit in the same network as our TCE Workload nodes. As a refresher:
- To deploy TCE components, we requested that you identify a target VLAN/subnet
- A portion of this subnet was utilized in a DHCP pool for TCE nodes.
- Two (2) more IP addresses in this same subnet, but not contained the DHCP pool, were reserved
- At least five (5) but up to fifteen (15) additional addresses from this same subnet must be reserved for NAPP load balancing services. We recommend you reserve fifteen (15) addresses to support additional TCE Workload Cluster nodes.
Installing MetalLB to the TCE Workload cluster
To install MetalLB, first ensure you are in the TCE Workload cluster context for kubectl. You can check your current context with:
kubectl config current-contextIf you are not in your workload context, you may first list all of your contexts with:
kubectl config get-contextsAnd once you’ve identified the TCE Workload cluster context, you can change to it via:
kubectl config use-context <context-name>Now that we are in the TCE Workload cluster context, we’ll install MetalLB using the ‘Installation By Manifest‘ method as detailed on the MetalLB site. It only requires two commands, which are:
kubectl apply -f https://raw.githubusercontent.com/metallb/metallb/v0.12.1/manifests/namespace.yaml
kubectl apply -f https://raw.githubusercontent.com/metallb/metallb/v0.12.1/manifests/metallb.yaml
Copy and paste each of those, and you’ll receive the following output:
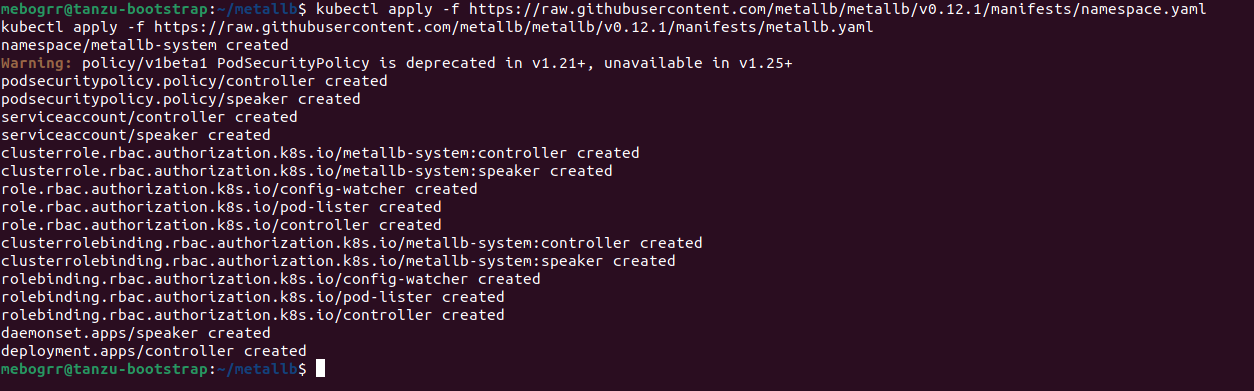
MetalLB has now been installed, but until it is provided with it’s base configuration, it cannot provide VIPs for load balanced services.
MetalLB Configuration
Like virtually all K8s constructs, MetalLB is configured via a YAML file. You can copy and paste the L2 YAML config template from the MetalLB configuration page, but here’s a copy of the one we’re using:
apiVersion: v1
kind: ConfigMap
metadata:
  namespace: metallb-system
  name: config
data:
  config: |
    address-pools:
    - name: default
      protocol: layer2
      addresses:
      - 172.16.90.80-172.16.90.94
That’s the configuration you will need in it’s entirety. The only part you will alter is the address range you use in your environment. You can see we’ve allocated a range of 15 total IP addresses, and as mentioned before, these are from the same subnet in which your TCE nodes reside. Simply copy the above, change the addressing, and save to a file (we called ours ‘metallb-config.yaml‘).
Once the YAML file is created, apply it via kubectl like you would any other K8s configuration. (FYI – you must be in your TCE Workload cluster kubectl context, as you were for the previous sections; if you’re doing these steps in order from the post, you are already using this context). Use the following command to complete your MetalLB configuration:
kubectl apply -f metallb-config.yamlYou should get a ‘configmap/config created‘ message back from kubectl, indicating that the config map requested was created successfully.
Service Name for NAPP
Earlier in this post, we pointed out the ‘Service Name‘ NAPP requirement, which is a FQDN for which you must create a DNS ‘A‘ record to utilize NAPP. During NAPP deployment, the Service Name FQDN is provided to the NSX-T manager and resolved to an IP address via DNS. This IP address must be part of the MetalLB range configured in the YAML file.
As an aside, while we are creating a DNS ‘A‘ record for the ‘Service Name‘ FQDN, another supported option is the utilization of ‘ExternalDNS‘; this is referenced in the ‘Service Name‘ entry of the NAPP prerequisites. Configuring and utilizing ‘ExternalDNS‘ is out of scope for our series, but it is a viable option if you so desire.
For simplicity, we recommend utilizing the first IP address in the range, but you could select any of the addresses. For example, we created ‘napp.myhomevlab.com‘ as our FQDN, which resolves to ‘172.16.90.80‘. If you look at our example YAML file, you’ll see that ‘172.16.90.80‘ is the first IP address in our range.
Ultimately, the IP address for the ‘Service Name‘ FQDN must be part of the range you supply to MetalLB. If your FQDN resolves to an IP address outside of the configured MetalLB range, the NAPP deployment will fail.
Wrap Up
For our deployment of NAPP, we’ve:
- Deployed and configured MetalLB in our TCE Workload cluster
- Selected an IP address from the configured MetalLB range for the ‘Service Name‘ FQDN
- Created a DNS ‘A‘ record for our ‘Service Name‘ FQDN
If this post feels a little lighter in effort than other parts of the series…. well, it is! Rather than trying to jam in the MetalLB topic in another post, we thought it was best to allow it to stand on it’s own.
With all that being said, now that we’ve gotten all of our mandatory prerequisite work completed, it’s finally time to deploy NAPP. Come back for our next post to see everything come together!
